Tuesday, November 29, 2016

Starting my Quincy module build

Finally started building my Quincy modules. I'm using the track plan from Campbell's with the exception that I'm making mine a single track mainline.
Each module is 2x4 feet. There is a total of three modules.


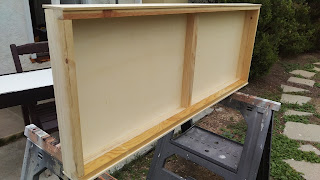
The above pictures show 2 of the 3 modules. The outside photo shows two sections joined together.  I'm using brass dowels to align the sections.

Below is a work in process group of pictures. I'm using Central Valley tie strips and turnouts.


I'll be posting the rest of this build on my Quincy module blog. see link on the right.


Monday, October 3, 2016

Gorre and Daphetid cars

Picked up a bunch of G&D cars plus 3 undec cars for only 40 bucks. I've got decals to letter the caboose and the 2 reefers. The reefers used to to be yellow, no lettering that I repainted red. I wanted red reefers to match the passenger cars. The yellow reefers are numbered in the low 100's, so I'm going to number the red ones 150 and 151. I'm just going to build the kits up as designed,  no super detailing, just metal wheels, Kadees and some weathering.
I'll put and interior and some people in the coaches, maybe lights too.

Monday, May 2, 2016

Quincy enginehouse

I'm building 2 models of the aforementioned enginehouse. I picked one up on eBay and found that the seller had started it and glue wood siding over the cardboard instead of corrugated metal as per the prototype. So I decided to go ahead and build two of them, a wood sheathed version and a scratch built one with corrugated metal.

The wood one was built first and was a very straight forward build. I used a Peco engine inspection pit and Woodland scenics LED lamps. The fence is Central Valley and a few figures and detail castings were added to the diorama.

The other building was built using individual board on board. I used the kits corrugated metal and weather it using AK washes and chalks. 

Above you can see the walls before I added the metal sheathing. I wasn't sure we're or how big the openings for the tool room and machine shop were, so I made a guess. I made both openings towards the rear, thinking that if they were working on something, they would like to be out of the weather and could have the engine sitting partially outside and not block the openings.


Below is the assembled structure.

Not sure if I'll finish the roof since I want to add interior details later. You see that I re-weathered the tool room.

Here are both buildings 


The structure on the left (diorama) is for sale. $350 which includes shipping. If interested, drop me a note.
Spaceway1999@yahoo.com
Monday, April 18, 2016

Finally an update

Hi everyone!
Sorry that it's been so long without an update! I've been remodeling my house and now it's done!! The kitchen was the last ( and most expensive) part of the project.
Cabinets got added to this area 

Pink and yellow tile! So 1950s 

Demo time!

Add more cabinets and put the microwave over the stove

More counter space and I also added a dishwasher.
Put in recessed lighting and Led strip lights under the cabinets near the floor. Used Hue adjustable led strip lights. Can control them with my phone. Lots of fun!