Tuesday, January 28, 2014

Campbel Coal Tower Coal Pocket

I've started on the coal pocket.
I added a new link to Dave's Rio Grande page.
He has some great pics of the tower at Chama
http://davesriogrande.net/Structures/ChamaCoalTower/ChamaCoalTower.htm

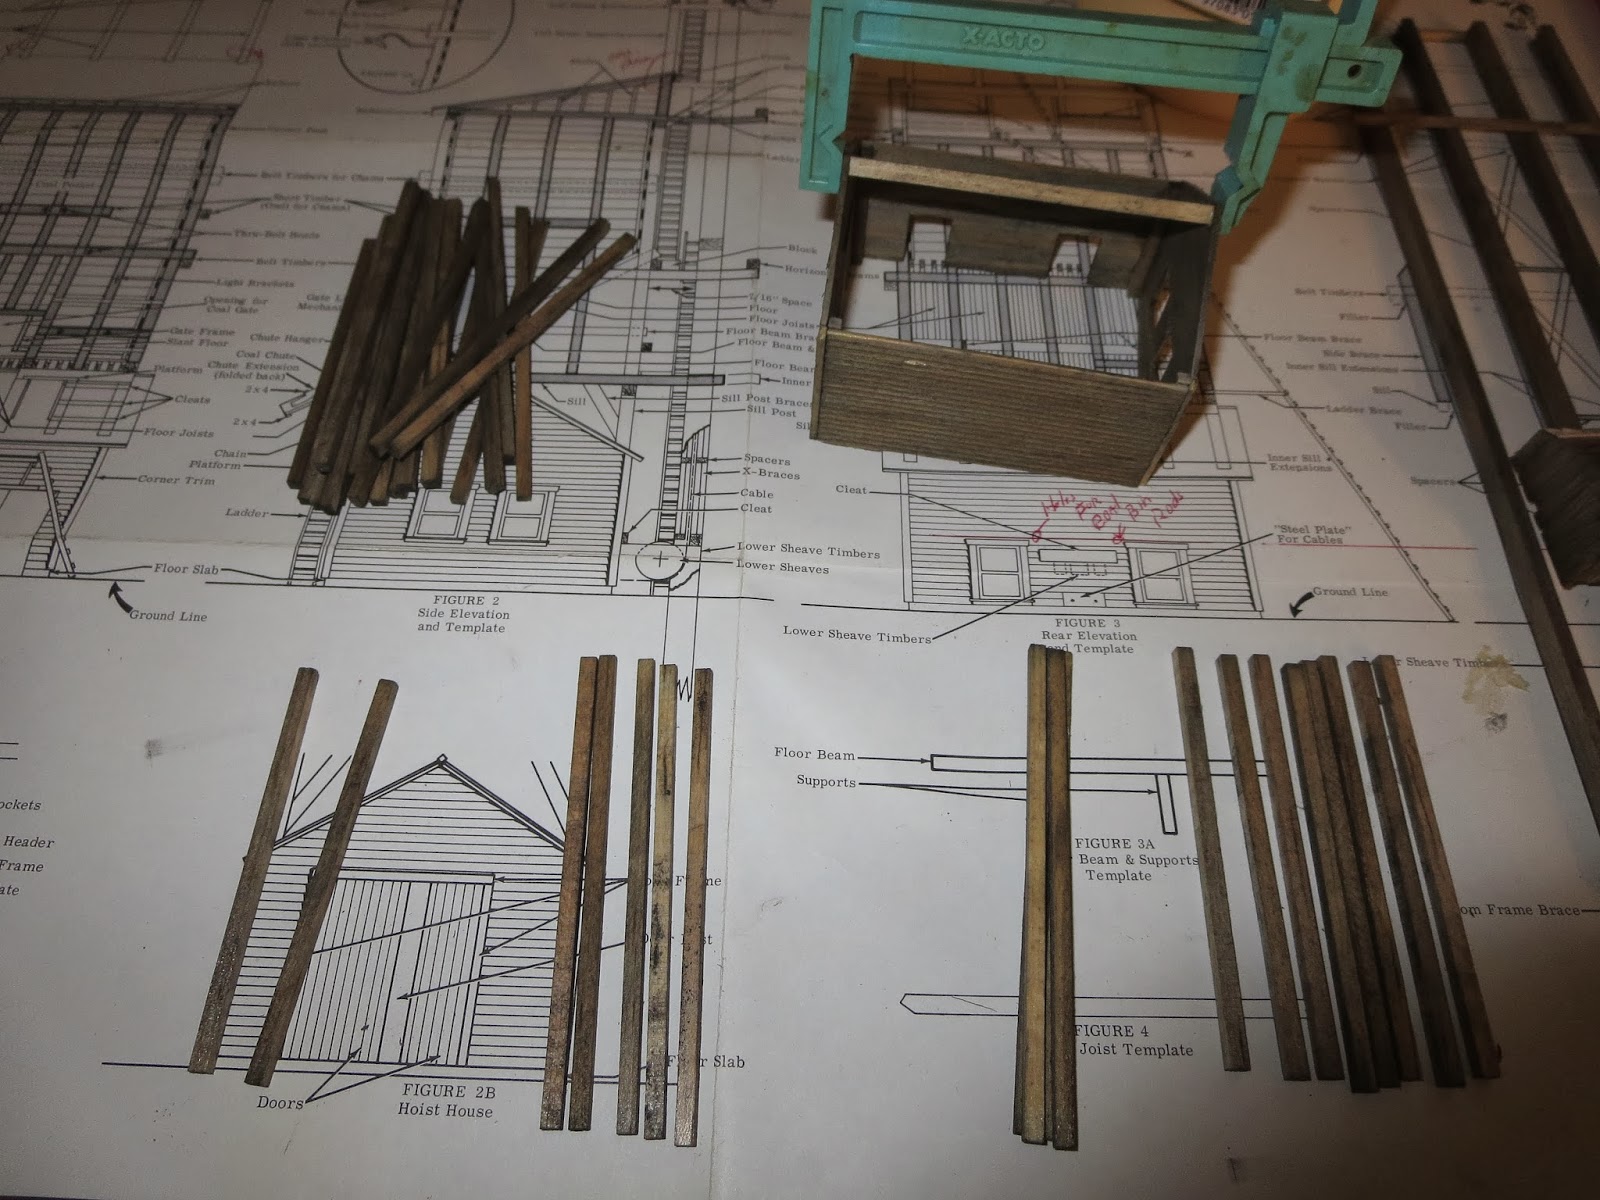
The pic below shows all the sides built up over their templates.
You should not have to cut any parts to fit, they are all precut to the proper lenght, so if a part needs cutting, stop and look for another one. It's there somewhere!
Looking down inside frm the top. I started adding the floor joists
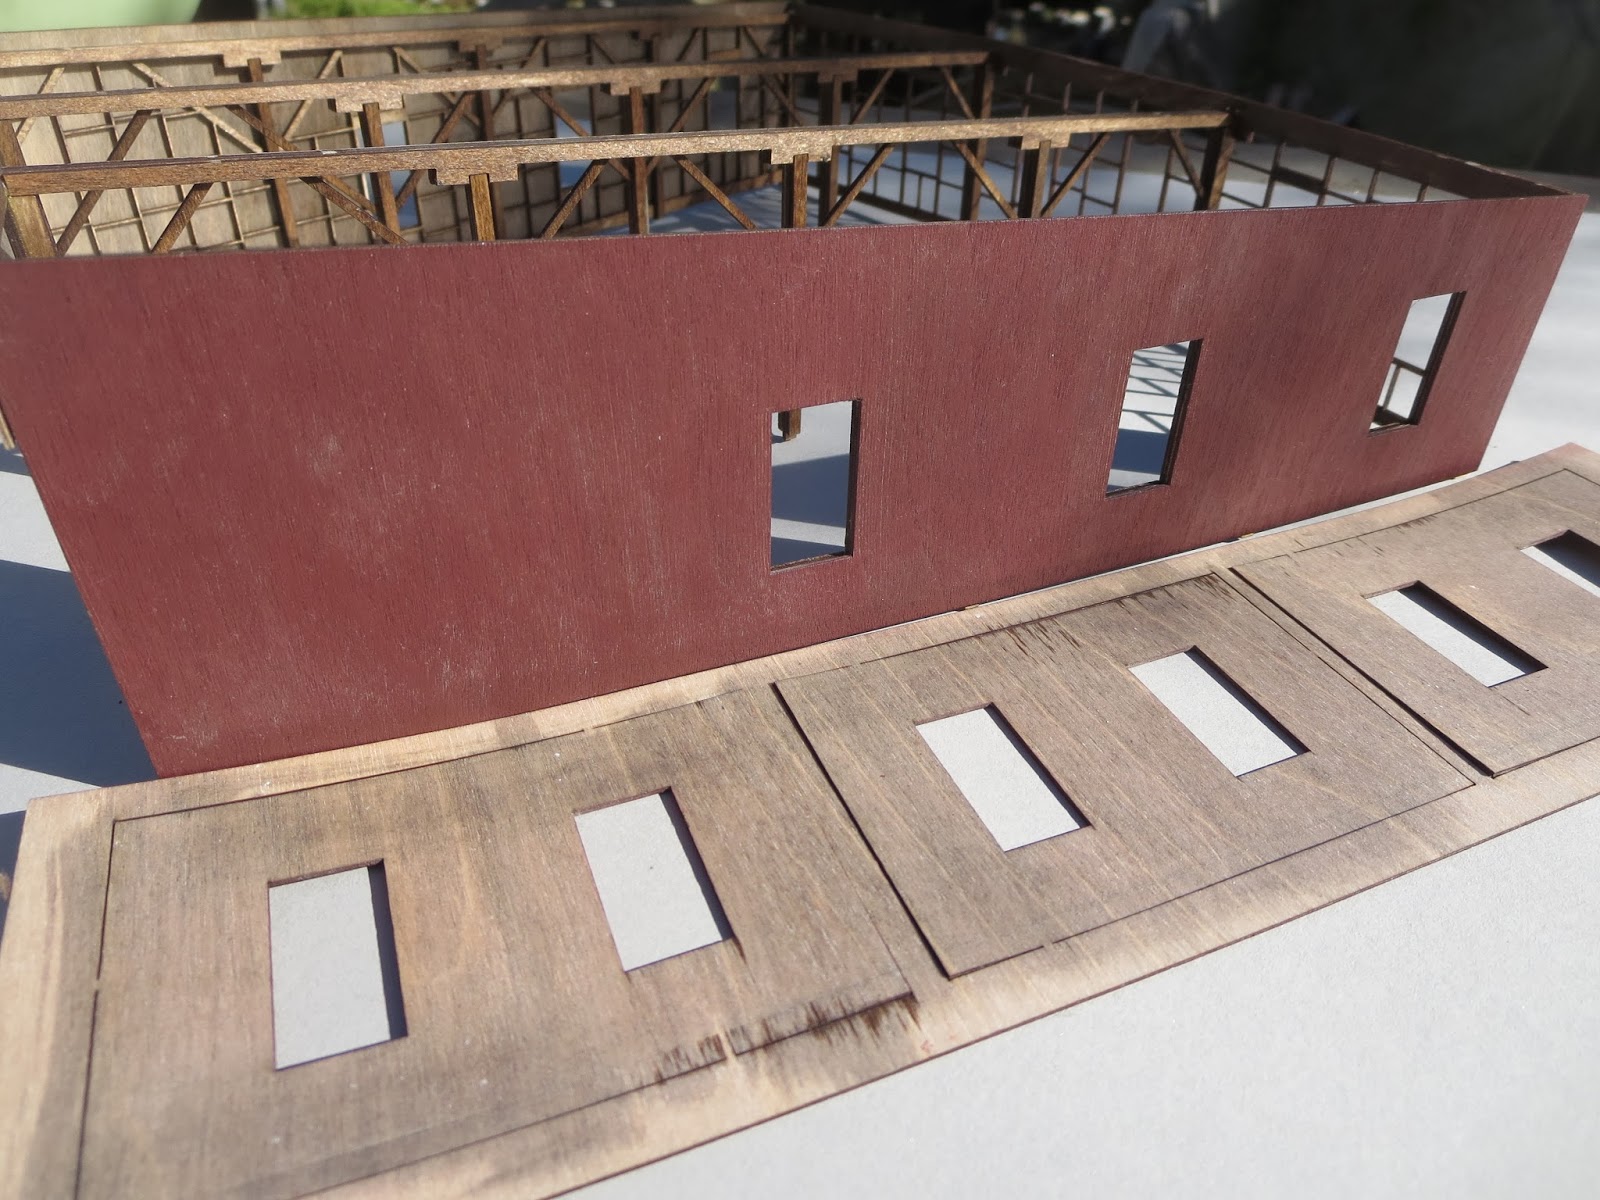
The backside.

The front. I added Grandt line nut/bolt detail.
Test fitting the floor

Below is the  real esate template
Youcan see it occupies an area 5 x5.5 inches.
The pit track center line is 1.5 inches from the outside edge.
The track center line for the tower side may depend on what the largest engine you have.
I'm setting mine at 1 inch from the edge of the hoist house (for now)
I cut the paper to the actual dimesions listed and will use it to help me in my track planning on the diorama.

If anyone is building one and would like to share their work, I'll be happy to add your pics

Thursday, January 23, 2014

Building the Campbell coal tower

I started laying out the various sizes of wood. You can see I have the hoist house put together, less the roof. Everyone who has one of these kits, get it out and let's build together and share your work.
After looking at pictures of Chama, it is apparent that the outer loft house supports are shown too far in. These need to be moved to the edge and be one solid piece on the corner.  (Shown in red)I understand why there are drawn there, they will then lineup with the bucket hoist rails. But on the real one, they don't
in the picture below, I've added a red line that shows the center line for the rods that open the coal drop doors. This helps locate the bottom cross piece on the bucket rails. It needs to move up a bit from the plan

In this picture, I've added a piece to fill in between to coal drops. (not shown on the Campbell plans) Not sure of the depth on the real one, so I made mine 2 feet below the the top. I also glued the hoist house floor to the back side

Next up is building the coal pockets.
Where's my Single malt Scotch?

Tuesday, January 21, 2014

Coaling tower build

I'm now starting the coaling tower project. I'm using the Campbell Coaling Station.
I started the coal pit first.


This will be painted concrete. Actually it's outside drying now as I write this.
The view above shows the 2 openings for the coal doors.

Sargent RH roof

I finally finished the roof project
After gluing down the tarpaper, I airbrushed all the seams black. To do this I set the airbrush down to a very fine line. After that was done, I sprayed the roof with Tamiya black-green.

After that all dried, I glued down the vents and sprayed them with Testors exhaust


I then sprayed the whole roof with a diluted black wash, which I did while cleaning my airbrush

Need to fix the corner as I see the paper is lifting a bit.
 
Airbrushed some soot to the underside of the roof

I'll add the doors and  talk about the pit installation when I install it. Not sure when that will be as I'm still waiting on my turntable to come back from Walthers. It seems that have had a few of the N scale TT's get returned!. In the meantime, I'm starting to work on the coaling tower

Sunday, January 12, 2014

Doors & windows for Sargents roundhouse

spent the last few days making the doors and windows.
These are multi part assemblies.

The windows have a frame, a sash, upper window with frame and lower postionable window plus laser cut aceate for the window glass.

 Got the outside frames in place. I then added the window bits to this.
For the side walls I built the whole window and popped them in. I added a small drop of glue to the lower window bit, as the tend to fall out since there is not that much self adhesive for it to grip.
In this pic (above) you can also see the woodgrain texture I put into the walls

The upper window with frame.
 
Here are the parts to make one door.
On the far left are the 2 doorframes, inner and outer door plus the window material (in white, still has the protective paper on it).
the center 2 doors are a complete inner and outer part of the door. The window glazing gets sandwiched between the 2 sections. The far right pic is a complete door assy

Below is a pair of completed doors. Just need to add the hinges.
I found that my doors had a curl to them so I put them on a glass table and piled some heavy books on them overnight to flatten them out.

 
Below are 2 shots of the building with the windows all installed.
Need to hit the walls and windows with some chalk to dirty them up a bit

Almost done. Need to tarpaper the roof next.

Monday, January 6, 2014

Sargents roundhouse roof rafters

The roof rafter job is finally finished!
 
I'll hit the roof with the airbrush and chalks next and add some soot.

 
Make sure you have the right tools to do the job!


The next job is to add tarpaper to the topside of the roof.
Might have enough supplies to get through this.

Sunday, January 5, 2014

Thursday, January 2, 2014

Since some of you have asked about the Walthers TT conversion I was doing, I'm still waiting for a replacement TT from Walthers. After I finish the roundhouse, I'll be moving on to the coaling twer build.
 
Nothing to do with this project. Some pics of Japanese passenger trains I recently rode.

This is only run on sme weekends to some of the hotsprings
Very nice train. There are lots of "special" trains that are limited to various seasons. If anyone is interested let me know.

Finished up all the walls today. I dry brushed the battens with some rust colored paint and also lighty sanded them. This helps breakup the solid look of red paint. I also brushed on some lighter colored chalks on the wall (before putting the battens on) in order to give them more colour variations.
Here you can see that I stained the interior with grey ink.
The outside is painted Tuscan red


Before putting on the battens I test fit them, then removed the paper backing. Starting from the center of the wall, I slowly laid out the batten overlay and once I liked it's position, I pressed them down hard. Be careful, once down they don't want to be removed!!!

The oak colored interior framing contrast nicely with the outside walls.
Might dust the insides with some chalk to help tie it together.

You can see the subtle highlights of the battens.
Hard to tell in this pic, but I stained the lower 1/4 inch of the walls darker.
I also made up the exhaust stacks and got the doors painted.
I won't install them (the doors) until this building is on the diorama.
 
Next up.
Not sure what colour to paint the windows?????
Guess I'll build the roof next. That's going to be a mindless task of cutting millions of rafters........


Wednesday, January 1, 2014

I'm back from a 2 month holiday in Japan ( see my OnsenJohn blog) and have been busy on my Sargents roundhouse project.

This is one of the 2 center beams, you add legs and top beam to both sides to thicken it and to also to have locating tabs on the legs and the ends
 
The sides get doubled up, make sure you add them to the interior side! 


Here, I'm glueing the 2 center supports to the front wall support. I haven't glued the supports to the floor yet, as I will need to cut out the pit floors and locate the floor to the layout later.


Make sure the joints are tight

 
All the interior walls are done !
I've sanded the tops of the beams to make sure the roof will have a nice surface to mate too.
Need to touch up some stain
 
Today, I'll be adding the exterior walls (maybe)


Happy New Year Everyone!

I'm now retired and plan on getting a lot more things built and posted here.